Intune.Training Blog

The place to learn Microsoft Intune

Getting started with Bulma Clean Theme for Jekyll

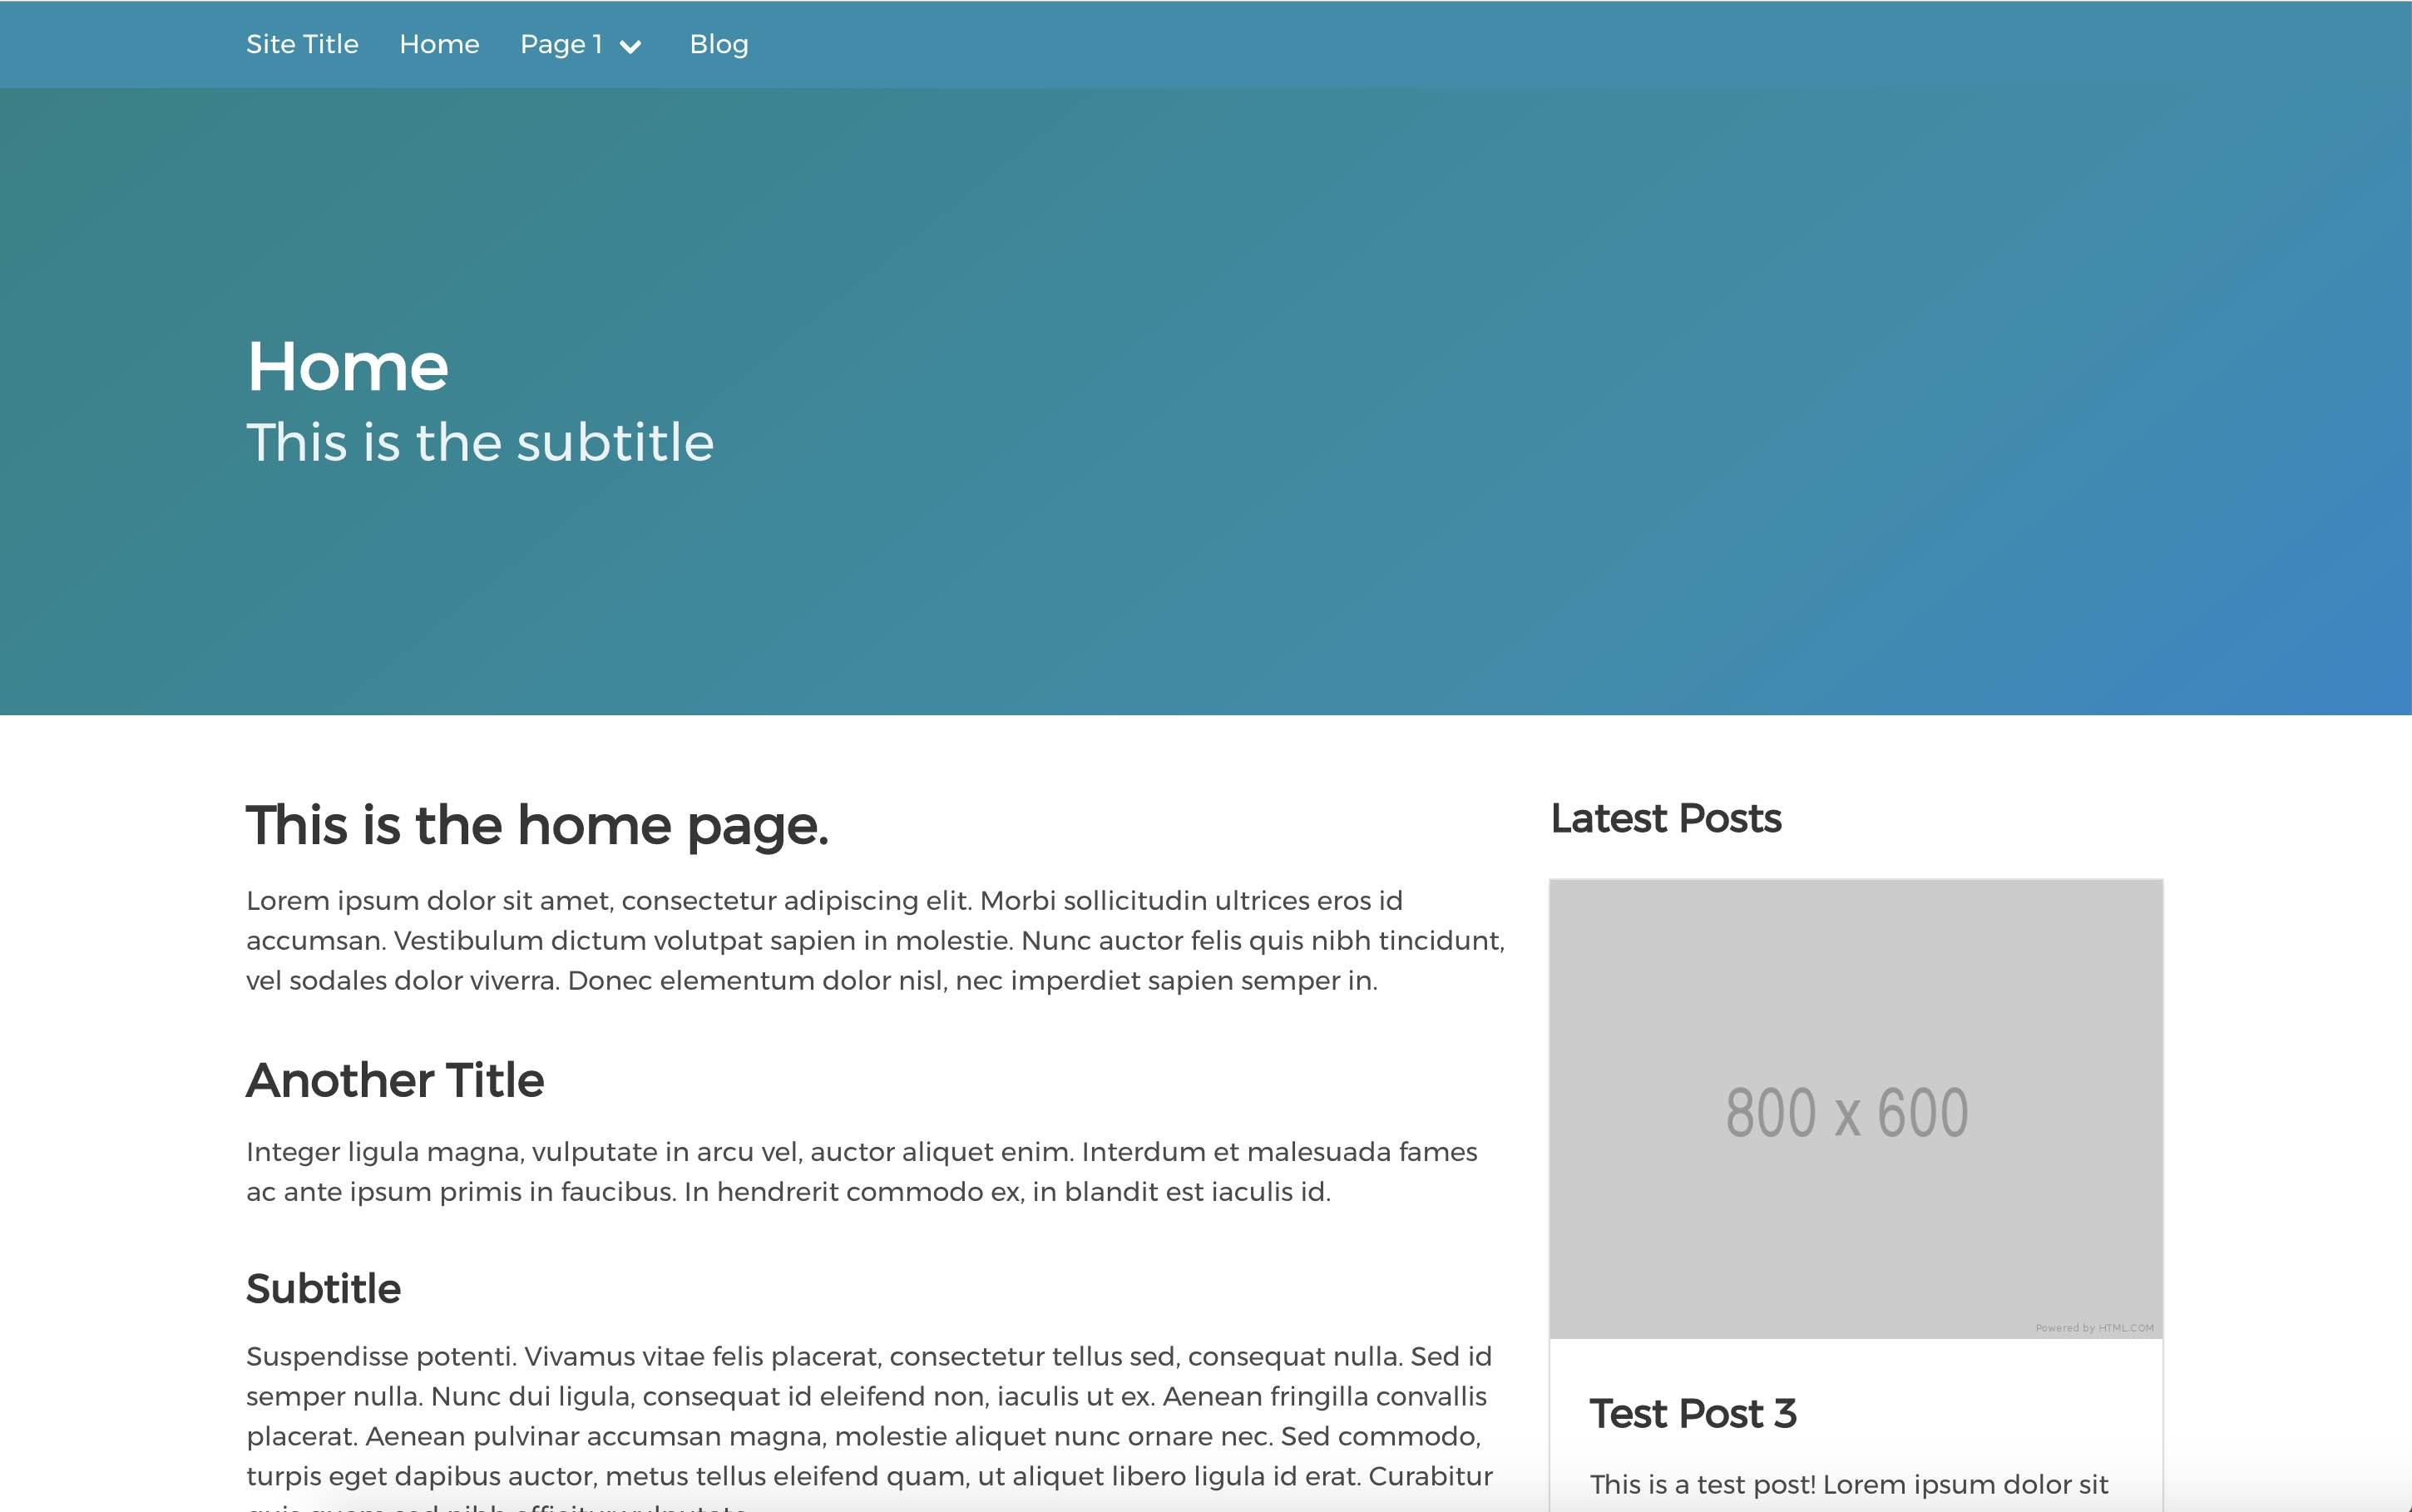
I have made a theme for Jekyll which is based on the Bulma frontend framework. It might look familiar, because I am also using it for this site. If you like the look of this theme then I thought I would write a little blog post about how to use it for your own site and how you can use it with GitHub Pages.

Getting started

First things first, you need a local instance of Jekyll running on your computer. I’m assuming you are familiar with Jekyll and have everything you need installed. If this is not the case, check out the documentation on the Jekyll website. For this example, lets call the site myblog.

Create a new installation of Jekyll, then go into the myblog directory:

jekyll new myblog
cd myblog

Then add the theme to the Gemfile:

gem "bulma-clean-theme"

Then add the theme to your _config.yml:

theme: bulma-clean-theme

Then run bundle to install everything

bundle

You can then preview your site by running the usual command

bundle exec jekyll serve

Creating pages

A page can either be a html or a markdown file, as long as you set the frontmatter. There are a few settings that pages can use to customise the default theme a bit further if you so choose.

---
layout: page
title: Page Title
subtitle: Page Subtitle
image: /path/to/image.jpg
description: The pages meta description
hero_image: /path/to/hero-image.jpg
hero_height: is-fullheight
---

If you don’t set a subtitle, image, hero_image or hero_height then defaults will be used or in the case of the hero_image, no image will be used on the hero.

The theme uses the jekyll-seo-tag plugin so it will use the information you provide in the frontmatter to auto populate the meta tags and open graph tags.

Posts

Posts are created as per the standard Jekyll method, in a _posts directory, with each post named YYYY-MM-DD-name-of-post.markdown. For the post frontmatter you can use the same settings as a page, except you need to change the layout to post and add date and author settings.

Blog page

For the blog homepage, create a blog.html page with layout: blog and use the other settings from a normal page. The theme is set up to use jekyll-paginate so you just need to add pagination options to your _config.yml

# Pagination settings
paginate: 5
paginate_path: "/blog/page:num"

Site defaults

If you don’t want to set each hero_image individually, then you can set default values in your _config.yml. The below example sets a default author, layout and hero image for every post. It also turns on the side bar on the right of post pages, which will display links to your latest posts.

defaults:
  -
    scope:
      path: ""
      type: "posts"
    values:
      author: "Author Name"
      layout: post
      hero_image: /path/to/hero-image.jpg
      show_sidebar: true

Styles

The theme uses Bulma frontend framework which provides a wide range of sass variable customisations. If you want to overwrite any of the standard variables, such as the primary theme colour, then set a sass variable in a new file in assets/css/app.scss before importing the main stylesheet.

---
---
$primary: #333333;
// Import Main CSS file from theme
@import "main";

You can also add any of your own custom css to this file if you want to.

Once you have created posts and pages, you will need to create a way for visitors to access them. The theme makes use of the Bulma navbar, which is configured through a simple yaml file. All you need to do is create a navigation.yml file in _data directory with the following format with the pages you want to include in the top navigation. You can now also add items to a dropdown menu.

- name: Page 1
  link: page-1
- name: Blog
  link: blog
  dropdown: 
    - name: Page 2
      link: page-2

Bulma is pretty handy in the way it converts the same HTML into a mobile / tablet friendly navigation, so you only need to set the menu up once for all screen sizes.

Using bulma-clean-theme with Github Pages

For the site to work with Github Pages, all you need to do is update the _config.yml so it uses remote_theme instead of theme and update it to chrisrhymes/bulma-clean-theme so it knows which GitHub repo to pull the theme from when it builds your site.

#theme: bulma-clean-theme
remote_theme: chrisrhymes/bulma-clean-theme

And then push up your changes to Github as normal.

There seems to be an issue where Jekyll doesn’t work locally with remote_theme, so when working locally you have to add theme back in, but remember to comment theme out again before pushing back up to GitHub or you will probably get a build warning email.

I hope you’re not feeling overwhelmed

It may seem like there is a lot to do to get started, but really it shouldn’t take very long to get a site up and running. All the options are there just in case you want to further customise the theme to be more personal to you, but you can just use the basic minimal settings to get yourself up and running.

Feedback and Issues

If you have any feedback, ideas or issues with how the theme could be improved, then please create an issue on the theme’s GitHub page and I will try and take a look into it as soon as I can. The theme is still quite new and I have quite a few ideas for future enhancements, so I will write a new blog post on this site when any new features become available.

Why use a static site generator

There are many ways to make a website and many different CMS platforms you can use, such as WordPress and Joomla, as well as site builder tools that offer you drag and drop interfaces, but what about static site generators?

A static site is pretty much what it sounds like, a set of pre generated html pages. Other platforms take what you enter into the CMS and process the information stored in the database, alongside a template or many template partials and dynamically construct the page before serving the html to you in your browser.

Speed

The initial advantage of a static site over a dynamic, database driven site is the page speed as means a lot less processing has to be done before the page is delivered. Some CMS’s provide caching which means that the first visitor to the page gets a dynamic version and then stores a cache of the page. This means subsequent visitor to the page gets the page quicker than the first. If you have a regularly cleared cache, or low numbers of visitors, subsequent visitors may not benefit from the caching and would all experience the increased load times.

Version Control

The next advantage of a static site is that it is that it can be version controlled. Usually a CMS relies on a database, which means that if you delete a page or some page content you either have to have revisions enabled in your CMS so you can roll back to a previous version or you need regular backups of your database so you can roll that back to a previous version. A static site with version control means you can easily revert to a previous version of your site and content without the need for database manipulation.

Data Files

Static sites, such as Jekyll, also offer a way of storing data in a more human readable format, such as yaml or JSON. This means you can store data that is used in multiple places across your site in one file and reference it in many places. For example, you may have a data file containing products, which you want to list in a category page and a product details page and maybe feature it on the homepage as well. These files can also be version controlled, meaning any changes or updates to your datafiles can be undone easily. The files can also be easily edited in a text editor so if you need to make multiple product amends, such as updating a misspelt brand name you can use something as simple as find and replace to update the spelling in all places at once without having to navigate to multiple different pages in a CMS.

Design Freedom

The biggest benefit I find to a static site is there is more freedom for a frontend developer and how they design and build your site. Some CMS’s work in a particular way and you are limited by the way they work. Page builders are available for many CMS’s but it often results in a lot of effort to get a particular piece of content in a particular place on the page.

A static site generator gives you more freedom to write your own html and text onto the page in the format you want it, rather than having to customise or overwrite the html and css classes output by the page builder tool.

Data Protection

A lot of people like the idea of installing a plugin into a CMS to handle things such as contact forms, so people can contact you about something, but in all honesty, it’s easier just to have an email address on the page that users can click on and email you directly. The reason I say this is that you have to try and prevent spam emails by using some kind of captcha on the form, as well as maintaining an email service that will handle the form submission and either store the form data somewhere on your site or send it to you as an email. This is pretty basic stuff, but is further complicated by data privacy laws that dictate how you store customers data and how you protect it. I know a lot of small business users would prefer to not have the hassle of managing stored user data on their site.

Security

One last thing to consider is website security. There is always a chance that using a popular CMS will leave your site vulnerable as there are always security issues being identified. You need to constantly keep your site up to date and lock down the CMS login as secure as possible. With a static site, there is no login screen. The original content lives somewhere else and the compiled, generated html is all that needs to be uploaded to your website, minimising the risk. Any public facing website has some risk but anything you can do to minimise it is better for your website in the long run.

What will you use on your next project?

A static site may not be the first thing you consider when building your new website, but it’s definitely worth exploring the pros and cons before you start the next project. After all, a faster, more secure site is better for you and your visitors.

Latest Posts

S02E30 - What's new in Intune Reporting w/ Spencer Shumway - (I.T)

S02E29 - Beginners Guide to Accessing On-Premises Resources with Azure AD Joined Devices - (I.T)

Sorry about Adam’s keyboard noise and yes, this could be a very short video but we felt like there are people who could use a more in-depth discussion.